السبت، 24 ديسمبر 2016

glutenfree ginger bread house and a new watch from cluse

it's seems like that time was running even faster this year and now it's already christmas today! can you believe that? our year has been filled with many changes - let's just say that i hope we don't have to move again in 2017 already :D as every year we wanted our december to be as calm as possible, with a lot of time for baking and cooking, publishing lot's of christmas recipes on the blog, make an advent calendar for each other but as every year this month just went by in a second and was anything else but calm. last weekend we realized that christmas is just around the corner, so we finally bought an advent wreath and decided to take some time to make something special: a gluten free ginger bread house.
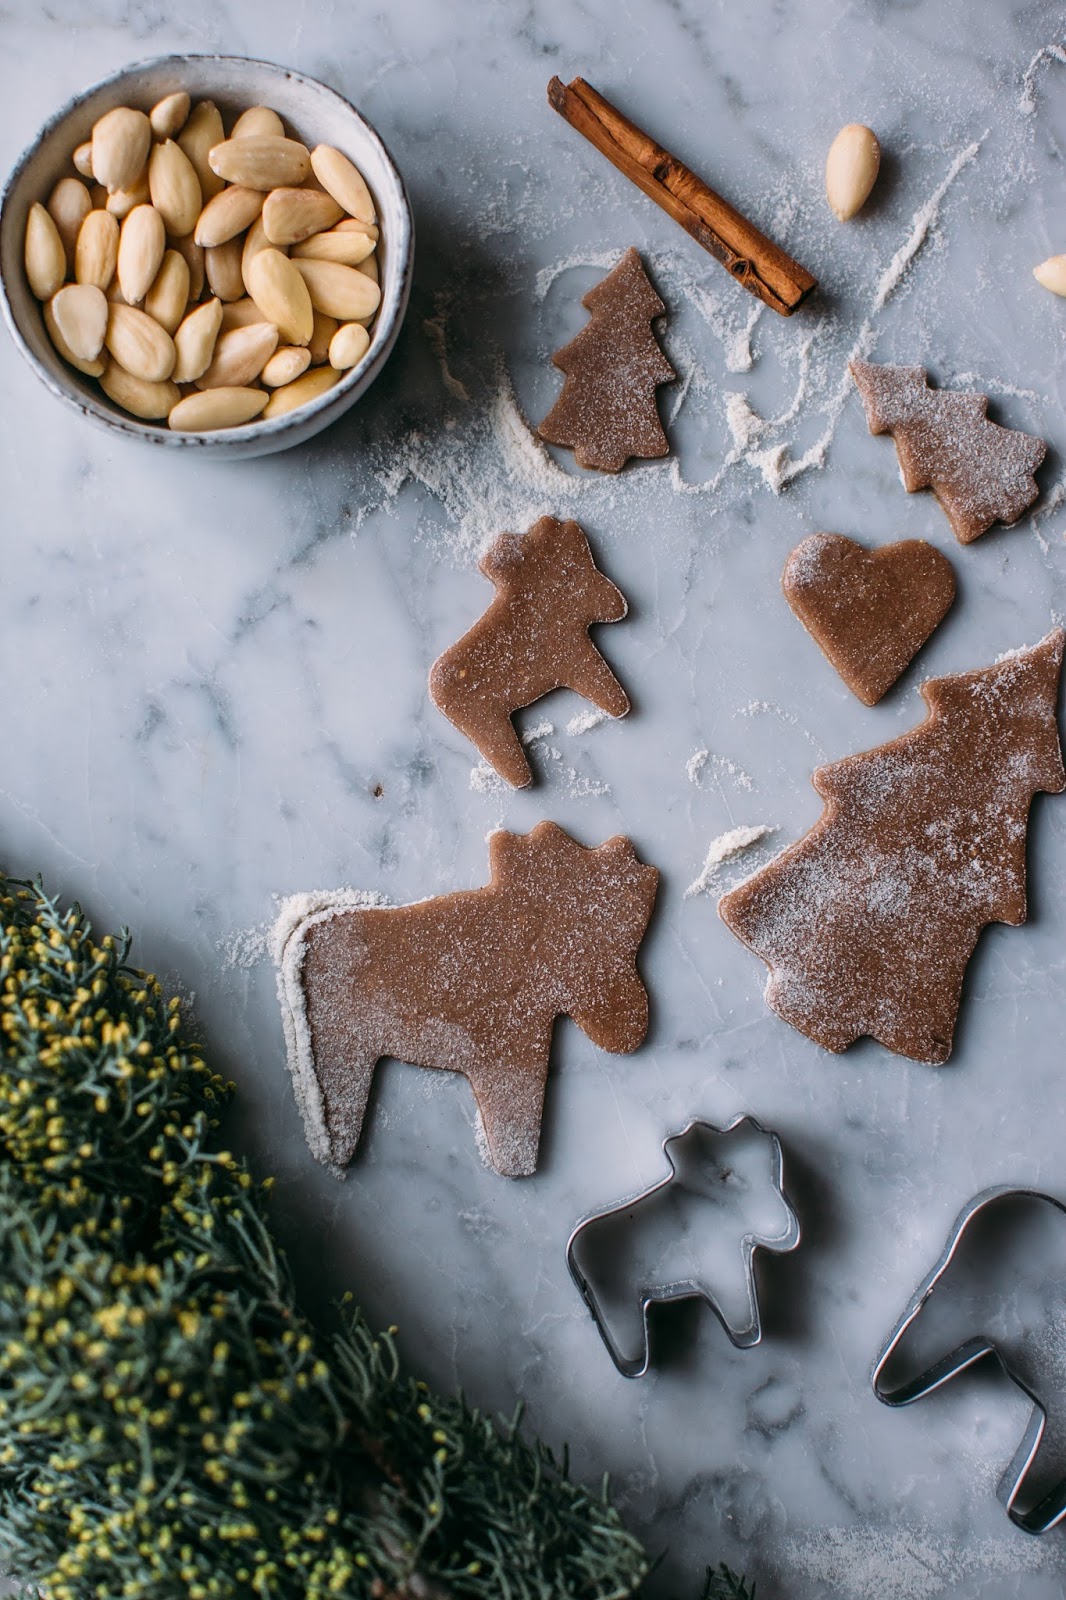
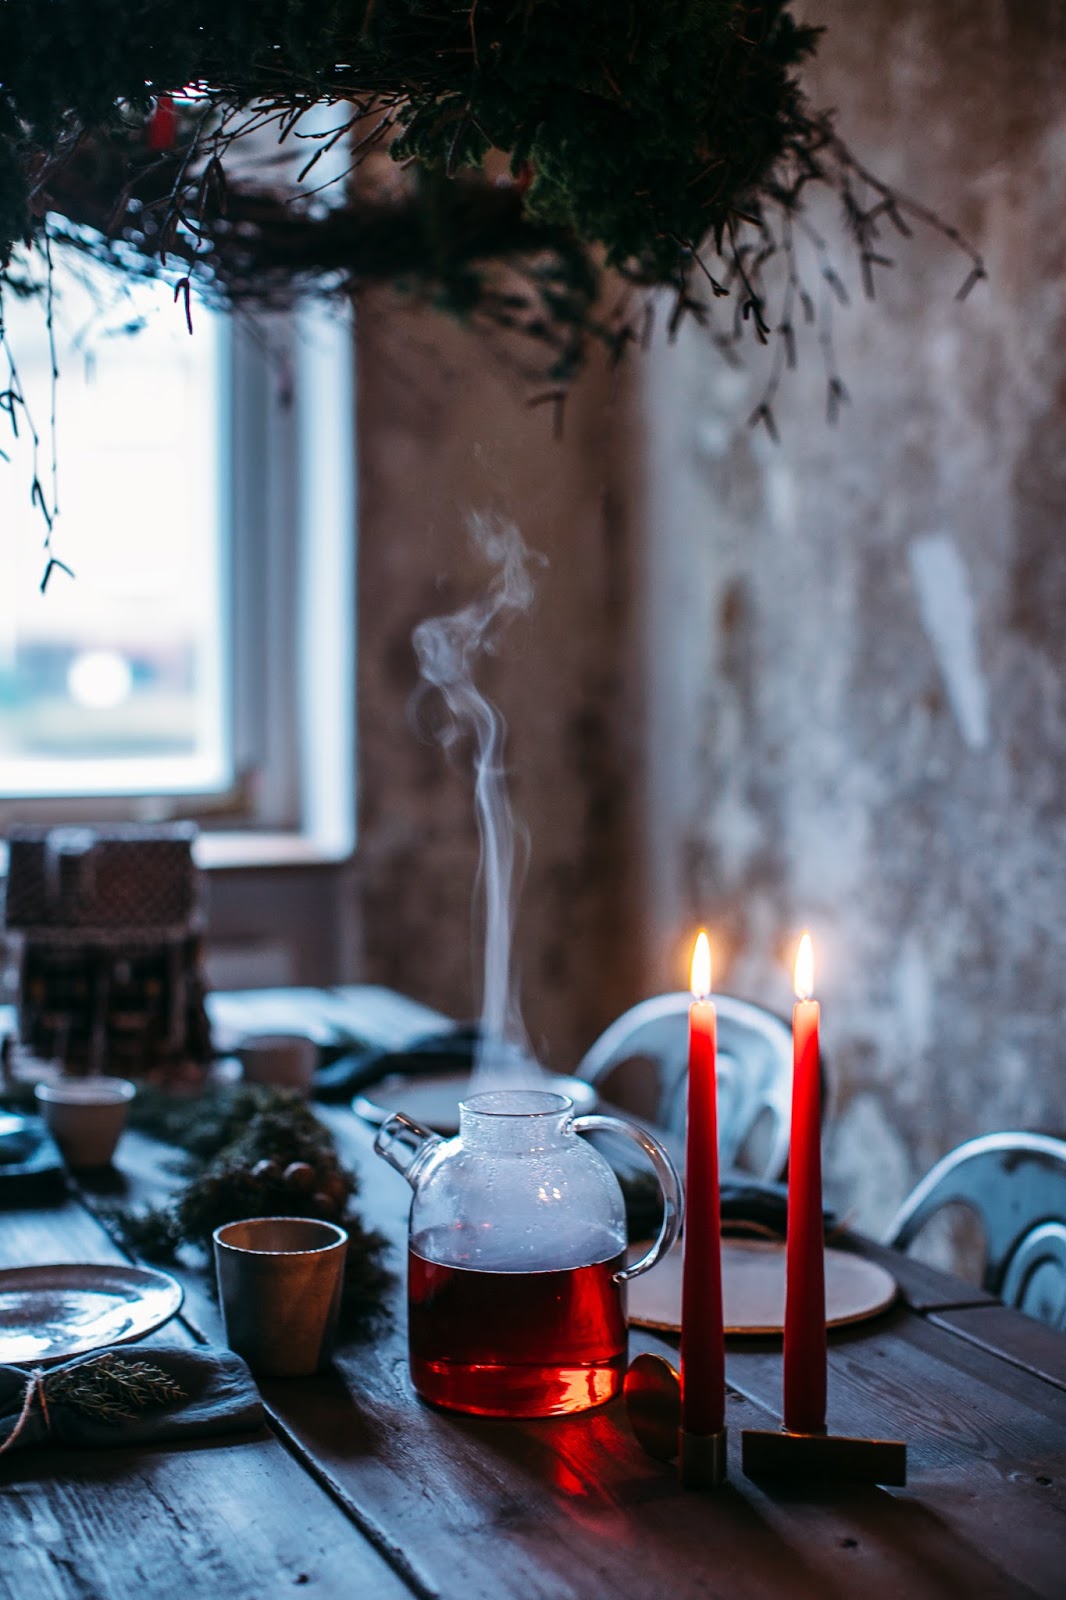
when i was little, i always went to a friends house in december and stayed there a whole weekend to bake ginger bread houses. the house was directly located at a lake and i rember how magical it was to wake up, going straight into the kitchen, which smelled like a ginger bread house itselfe, enjoying the calming view over the lake and just bake, talk and laugh the whole day. i haven't made a ginger bread house since then, so i was really excited for this one! especially since it's gluten free which can be a little bit tricky sometimes. but it turned out so well, nora's baking skills are magical <3 and of course we also made some extra cookies which are so delicious. so if you feel like doing some christmas baking during the holidays, go for it!! now we are very much looking forward to some calm and cozy christmas days, with delicious food and finally time to read some books.
we are also enjoying our early christmas gift, the beautiful watch* you can see in the pictures. it's from cluse* and we love how wonderful the golden bracelet it fits with christmas.
we wish you all very lovely, relaxing and merry christmas holidays! thanks for all your constant support, you guys are the best!
*sponsored


glutenfree gingerbread house 

ingredients for a house and a small forest
gingerbread (if you want to bake gingerbread cookies, then use a bit more baking powder and bake shorter)
240g butter
400g sugar
400g honey (e.g. acacia honey)
1000g rice flour
4 tsp gingerbread spice
2 tsp cinnamon
2 tbsp carob powder (or cacao powder)
2,5 tsp organic baking powder
2 eggs (size m/l)
decoration:
500g confectioners sugar and a bit more for sprinkling on top
4 egg whites 
extra decoration like snowflakes or similar
furthermore
templates for your gingerbread house (we designed our own templates and draw them on thicker paper)

melt butter, sugar and honig in a saucepan until sugar is completely dissolved and it has a smooth consistence. let cool down for some minutes. blend flour, gingerbread spice, cinnamon, carob powder and baking powder, then mix all together with the eggs and honey-sauce with the dough hook of your hand mixer for 1-2min. continue to knead for a couple of minutes with your hands - if the pastry feels very sticky knead in a bit more flour (the pastry should be soft and a bit sticky - it will turn firm in the fridge). wrap in clingfilm and leave in the fridge overnight. preheat oven to 180degrees top/bottom heat. cut a piece from the pastry, knead once more for one, two minutes until a bit softer and flexibel, then roll out directly on floured parchment paper. cut out some pieces from your house and leave pastry for another 15minutes in the fridge, then bake for 20-25minutes. repeat that process until you have all pieces baked. start decorating the house facades (except the icicles). for the icing beat 2 eggwhites together with 250g confectioners sugar and add a bit milk or water until you have the right consistency for the decorations. fill into a sandwich bag and cut off a tiny corner, so you can draw fine lines. draw your decorations on the facades, then built up your house. for that you need a more firm glew, so beat the remaining 2 egg whites together with remaining the 250g confectioners sugar (don´t add extra liquid). fill into another sandwich bag and cut off a bigger corner and start glew your house together piece by piece (you can use small cups or toothpicks to keep the facades still until the sugar-glew is firm). in the end decorate the icicles and sprinkle somw confectioners sugar. 


german translation
man könnte fast meinen, die zeit wäre dieses jahr noch schneller vergangen und jetzt ist heute schon weihnachten! könnt ihr das glauben? unser jahr war gefüllt mit einigen veränderungen - sagen wir einfach, dass wir 2017 nicht unbedingt schon wieder umziehen wollen :D. wie jedes jahr haben wir uns den dezember so ruhig wie möglich vorgestellt, mit viel zeit zum kochen und backen, wollten viele weihnachtsrezepte auf dem blog veröffentlich und uns gegenseitig einen adventskalender basteln. aber wie jedes jahr ist der dezember in gefühlt einer sekunde vergangen und war alles andere als ruhig. letzten wochenende ist uns klar geworden, dass quasi übermorgen schon weihnachten ist, also haben wir endlich einen schönen adventskranz gekauft und uns entschieden uns etwas zeit zu nehmen und etwas besonderes zu backen: ein glutenfreies lebkuchenhaus.
als ich klein war, bin ich immer im dezember für ein wochenende zu freunden gegangen um gemeinsam lebkuchenhäuser zu backen. das war eine schöne kleine tradition. das haus von den freunden lag direkt am see und ich erinnere mich noch sehr gut an die besondere stimmung, wenn man morgens wach wurde, vom lebkuchenduft in die küche gelockt wurde, die ruhige und schöne sicht auf den see genoss und den ganzen tag gemeinsam gebacken und geplaudert hat. seit dem habe ich tatsächlich kein lebkuchen haus mehr gebacken und habe mich auf dieses um so mehr gefreut! glutenfreier teig kann ja manchmal ein bisschen tricky sein aber das haus ist einfach fantastisch geworden, dank nora's magischen baking skills <3 und natürlich haben wir auch noch ein paar kekse gebacken, die wirklich vorzüglich schmecken! wenn ihr also lust habt in den feiertagen zu backen, probiert sie unbedingt aus!! wir freuen uns jetzt auf ruhige und gemütliche tage, mit viel gutem essen und endlich zeit mal wieder ausgiebig zu lesen.
außerdem erfreuen wir uns an unserer schönen neuen uhr, die the beautiful uhr* die ihr in den bildern sehen könnt. sie ist von cluse* und wir lieben das goldene armband, das auch so wunderbar zu weihnachten passt.
wir wünschen euch allen schöne, entspannte und vor allem frohe weihnachtstage! tausend dank euch allen für all eure unterstützung, ihr seid die allerbesten!!
*sponsored


glutenfreies lebkuchenhaus

zutaten für ein haus und ein kleinen wald

lebkuchenteig (wenn man den teig für kekse verwenden möchte, dann etwas mehr backpulver verwenden, damit der teig lockerer wird und etwas kürzer backen)
240g butter
400g zucker
400g honig (z.b. akazienhonig)
1000g reismehl 
4 tl lebkuchengewürz
2 tl zimt
2 el carobpulver (oder reines kakaopulver)
2,5 tl weinsteinbackpulver
1 prise salz
2 eier (gr. m/l)
dekoration:
500g puderzucker und etwas mehr zum bestreuen
4 eiweiss (gr. m/l)
zusätzliches dekoration wie zucker-schneeflocken, perlen o.ä.
ausserdem
schablonen für ein lebkuchenhaus (wir haben selber schablonen auf dickes papier gezeichnet und zurechtgeschnitten)

butter, zucker und honig langsam in einem topf schmelzen bis eine homogene masse entsteht bzw. der zucker sich komplett aufgelöst hat, dann abkühlen lassen. mehl, lebkuchengewürz, zimt, carobpulver, weinsteinbackpulver und salz mischen, ei und abgekühlte honigmasse dazugeben und zunächst mit dem handmixer (knethakenaufsatz verwenden) verrühren, dann mit den händen ein paar minuten weiterkneten. falls der teig zu sehr klebt, noch eine prise mehl unterkneten (der teig darf ruhig etwas weich sein und klebrig, im kühlschrank wird er fest). teig in frischhaltefolie verpackt über nacht im kühlschrank ruhen lassen. am nächsten tag ofen auf 180grad ober-/unterhitze vorheizen. für die einzelnen bauteile immer ein stück vom teig abschneiden, nochmals ein zwei minuten durchkneten bis er wieder etwas weicher und geschmeidiger geworden ist, dann auf einem bemehlten stück backpapier ausrollen, schablonen darauf legen und auschneiden. jedes blech bzw. lebkuchenteig sollte dann nochmal 15min im kühlschrank ruhen, dann erst für etwa 20-25min backen bis der teig sich relativ fest anfühlt. diesen prozess so lange wiederholen bis man alle bauteile zusammenhat (nicht das grundstück vergessen). zuerst die verzierungen auf den häuserfronten auftragen (bis auf die eiszapfen an den dächern). für die zuckermasse 2 eiweiss zusammen mit 250g puderzucker aufschlagen bis eine homogene masse entsteht, etwas milch oder wasser hinzufügen (nicht viel) bis es eine gute konistenz hat für die dekorationen. in einen frühstücksbeutel füllen und eine winzig kleine ecke abschneiden, damit man schön feine linien zeichnen kann. dekoration zeichnen, dann lebkuchenhaus zusammenbauen. dafür nochmals 2 eiweisse zusammen mit 250g puderzuckerzucker aufschlagen bis eine homogene masse entsteht (diesmal keine flüssigkeit hinzufügen). in einen frühstücksbeutel füllen und größeres loch abschneiden und lebkuchenhaus stück für stück mit dem zuckerkleber zusammenkleben (mit hilfe von kleinen tassen oder schaschlickspiessen wände am anfang ruhig halten). zum schluss eiszapfen an den dächern dekorieren und puderzucker auf das haus streuen.

الأحد، 18 ديسمبر 2016

glutenfree christmas "stollen" - bundt cake

since almost two weeks we keep trying to share this blogpost with you and here it finally is! 
nora and i have the tradition to make a gluten free bundt cake for christmas, since she made the first one for me three years ago. this time we enjoyed it with our dearest friend ezgi in our studio when we celebrated her birthday. ezgi's birthday is on st nicholas day, so it was both: a birthday celebration, but also a very christmassy feeling. we decorated our new table from j&v, one of our favorite vintage shops in berlin and hung up a gorgeous wreath, made by the talented ladies from mary lennox
the gluten free bundt cake is simply the best bundt cake i ever ate, seriously guys! we will make for our family dinner on christmas this year and i can only recommend you to do the same. it tastes a little bit like the german christmas fruit cake stollen but for me it tastes even better, because it's a bundt cake and i prefer this texture much more. by the way how are you guys going to spend your christmas days? 
we always celebrate with both our families - first we visit nora's family and then mine and this year our families might even meet at some point, let's see. but this gluten free bundt cake will be definitely a part of it, can't wait to enjoy it again. hope you will too :)


glutenfreier christmas -"stollen"-bundt cake (yeast free and alcohol free)

ingredients (for a large bundt pan)
batter
300g butter, soft
275g sugar
350g white rice flour
100g ground almonds
5 eggs (size m/l)
1 pck. organic baking powder
60ml milk (4 tbsp)
2 vanilla beans (or 1)
1 pinch of salt
1 pinch of cardamom
200g sultanas
400ml apple juice, naturally cloudly
100g candied lemon peel (in germany is alreay cut in tiny cubes)
100g candied orange peel (in germany is alreay cut in tiny cubes)
topping
confectioners sugar
a bit butter (so the confectioners sugar can stick easier to the cake)
pink pepper (optional)
candied orange slices (here the link to a recipe with candied lemon slices: http://www.ourfoodstories.com/2016/02/glutenfree-parsnip-lemon-cake-with.html )

let sultanas infuse in the apple juice for 6 hours - the best you use a jar, then you can shake it every 30-60min (if you have the time), so all sultanas are evenly infused. afterwards sieve them. preheat ofen to 180°C top/bottom heat. butter and flour your bundt pan thoroughly (the best way is to spread melted butter on the inner side with a baking brush) and leave bundt pan in the fridge until you´ve finished the batter. beat soft butter, salt and vanilla pulp for minimum 5min, then beat in the eggs one after the other (beat each egg in about 30seconds). blend organic baking powder, rice flour and cardamom, then stir in in 2 portions (now use the dough hook). stir in milk and ground almonds. in the end fold in the candied lemon and orange peel and sultanas. fill batter into bundt pan and bake for 60min. let bundt cake cool down for 10min before you remove the bundt pan carefully, then let cool down again on a cooling rack. melt a bit butter and spread generously on the outer side of the bundt cake, then sift plenty confectioners sugar on top. arrange some candied orange halves and sprinkle some pink pepper.


german translation
seit fast zwei wochen wollen wir diesen post mit euch teilen, endlich haben wir es geschafft!
nora und ich haben mittlerweile die kleine tradition einen glutenfreien gugelhupf in der weihnachtszeit zu backen, seitdem nora vor drei jahren den ersten glutenfreien gugelhupf - einen tag vor weihnachten - für mich gebacken hat. dieses mal haben wir ihn für unsere freundin ezgi gebacken, als wir ihren geburtstag zusammen bei uns im studio gefeiert haben. ezgi hat an nikolaus geburtstag und so waren wir alle schon richtig in weihnachtsstimmung. wir haben unseren neuen tisch von j&v, einem unserer lieblings-vintage-shops in berlin, festlich dekoriert und einen wunderschönen kranz von den unglaublich talentierten ladies von mary lennox aufgehangen und so einen wunderbaren nachmittag zusammen mit ezgi genossen.
der glutenfreie gugelhupf ist wirklich der beste, den ich jeh gegessen haben, ganz im ernst! wir werden ihn dieses jahr natürlich zu weihnachten für unsere familien backen und wir können euch nur empfehlen ihn auch auszuprobieren. er schmeckt fast wie stollen, mir allerdings noch besser, da ich den gugelhupf-teig von der konsistenz einfach lieber mag. 
wie werdet ihr eigentlich die weihnachtstage verbringen?
wir kommen immer mit unseren beiden familien zusammen - erst besuchen wir nora's familie und dann meine und dieses jahr werden unsere beiden familien vielleicht sogar zusammen feiern, mal sehen - auf jeden fall wird es diesen köstlichen glutenfreien gugelhupf geben. wir sind gespannt ob er euch genauso gut schmecken wird wie uns :)


glutenfreier weihnachts-"stollen"-gugelhupf (hefefrei und alkoholfrei)

zutaten (für eine große gugelhupfform)
teig
300g butter, weich
275g zucker
350g helles reismehl
100g gemahlene mandeln
5 eier (gr. m/l)
1 pck. weinsteinbackpulver
60ml milch (4 el)
2 vanilleschoten (oder 1)
1 prise salz
1 prise kardamom
200g sultaninen
400ml apfelsaft, naturtrüb
100g zitronat
100g orangat
topping
puderzucker zum bestäuben
etwas butter (damit der puderzucker besser haftet)
rosa pfeffer (optional)
kandierte orangenscheiben (hier der link zu einem rezept mit kandierten zitronen: http://www.ourfoodstories.com/2016/02/glutenfree-parsnip-lemon-cake-with.html )

sultaninen 6 stunden in apfelsaft einweichen lassen - am besten in einem weckglas. wenn möglich, alle halbe stunde oder stunde das glas etwas schütteln. nach der ziehzeit in ein sieb geben und abtropfen lassen. ofen auf 180°C ober-/unterhitze vorheizen. gugelhupfform sorgfältig butter (z.b. mit etwas geschmolzener butter und einem backpinsel), und mehlen - kurz in den kühlschrank stellen. weiche butter zusammen mit dem zucker, salz und vanillemark mindestens 5min aufschlagen, dann die eier nacheinander unterschlagen (jedes ei etwa 30sekunden unterschlagen). weinsteinbackpulver, reismehl und kardamom mischen, dann in 2 portionen unter den teig rühren (nun mit dem knethakenaufsatz). milch und gemahlene mandeln unterrühren. zum schluss zitronat, orangat und sultaninen unterheben. teig in die gugelhupfform füllen und für 60min backen. anschliessend für 10min abkühlen lassen, bevor man ihn vorsichtig aus der form stürzt. gugelhupf auf einem kuchengitter abkühlen lassen. etwas butter schmelzen und den gugelhupf grosszügig damit bestreichen. mit reichlich puderzucker bestreuen und kandierten orangenhälften belegen, mit rosa pfeffer garnieren.


الخميس، 15 ديسمبر 2016

How to Cook a Turkey & my Favourite Stuffing Recipe

The turkey is the centrepiece of both the traditional Christmas Dinner, Thanksgiving Dinner and the 4th of July Dinner and it's great for any other special occasion, which is why cooking it properly is so important. Mess it up and not even the best side dishes will save you! 

Turkey is becoming very popular because it is relatively low in cholesterol and high in vitamins that boost the immune system. It's also very juicy and tasty! 

So here are some tips on how to prepare & cook your perfect Turkey! 

A juicy & tender whole roasted turkey really does add to the sense of occasion at Christmas or Any time!
1. First things first. Buy a Fresh Turkey if you can. Don't buy a turkey that has been pre-stuffed as mishandling or incorrect cooking can cause bacteria to multiply inside the stuffing.

2. It's so important that if you're buying a frozen bird, that you thaw your turkey completely before cooking. If it’s done improperly, bacteria can multiply to a point where even oven temperatures won't be able to kill all of them off. This can cause food poisoning. 
The safest thing to do is to thaw your turkey in the fridge, but if you don't have the room, put it into a roasting tray in a cool room, covered with a dry cloth until it defrosts. You should leave the turkey in its original wrapper until you're ready to cook it.

3. If you're placing the turkey in the fridge (raw meat should always go the bottom shelf) also put it on a tray to catch all the juices that may leak out.  It takes approximately 2 days for a 15 pound turkey to fully defrost.

4. Don't wash your Turkey. The water splashing around will spread more bacteria than you are washing off it.

5. Add some extra flavour by loosely filling the cavity of the bird with some peeled vegetables like carrots, celery, onion & garlic which work great together. 

6. Before roasting, coat the outside of the turkey with real butter and season it with sea-salt and ground black pepper. Cover the complete bird with streaky bacon to add more flavour and to keep it from browning too much. Don’t forget to cover the legs too!

7. Loosely cover the complete bird with tin foil and scrunch it up around the edge of the tray. Once you get the turkey in the oven, resist the temptation to open the oven door! Every time you open the door the temperature drops and all the moisture escapes increasing the likelihood of a dry bird.

8. Have your oven Pre-heated to 180°C (170°C for fan assisted ovens), 365°F, so that the turkey is going into a hot oven.

The simple rules for Turkey cooking times are: 

If it weighs Less than 4kg (8½Lbs) weight cook for 20 minutes per kg
then add 70 minutes extra time.

If it weighs More than 4kg (8½Lbs) weight cook for 20 minutes per kg
and add 90 minutes extra time.

  • To Convert Pounds (lbs) to Kilograms (kg) multiply by 0.46
  • To Convert Kilograms (kg) to Pounds (lbs) multiply by 2.2

Here's a cooking Time example:
20 lbs weight Turkey = 20 x 0.46 = 9.2kg weight

9.2 kg x 20mins =184 minutes.
Add 90 = 2
74 minutes. 
Divide this by 60 (minutes in an hour) = 4 hours and 35 minutes Turkey Cooking Time.


8. About 30 minutes before the turkey should be done, remove the foil from the breast to crisp up the skin.

9. Test the turkey using a sharp pointed knife by inserted the knife the meaty area above the top of the leg. Push in the blade and the gently ease down on it. Juice from the turkey will run down the blade.
If the juices run clear then it is cooked. If there are traces of pink in it give it another half an hour in the oven and test it again.


If you have a cooking thermometer ensure that the centre of the thickest parts return a temp of 75°C.

10. After you take the turkey out of the oven let it rest, under the loosened foil, for about 15 minutes before carving. This lets the hot juices relax and spread evenly through the meat, giving a moist and juicy bird.

No. 11. Relax and Don't Panic... :)

My Favourite Stuffing Mix

This is a stuffing recipe that I have used for years. It is versatile and adaptable and can be used with any type of meat. This makes enough for 8 people - generous portions!

This is my recipe but you can add whatever herbs you like to your stuffing!

My Ingredients:
250g (10oz) butter
200g (8oz) diced onion
100g (4oz) diced red onion
100g (4oz) grated carrot
1 tblsp chopped thyme
1 tblsp chopped parsley
1/2 tspn cracked black pepper
2 cloves garlic diced
1 tablespoon of Mixed herbs
300g (12oz) white breadcrumbs made with crusts and all
300g (12oz) wholemeal breadcrumbs made with crusts and all
Use Gluten Free Bread if you wish

My Method:
1. Simply place the butter and all other ingredients, except the crumbs, on a medium heat and cook gently, stirring, until the onions and other veg are soft.

2. Add the breadcrumbs and mix in well until the crumbs have absorbed all the butter and juices.

3. If the stuffing feels a little dry (depending on the type of day, the weather, the heat of the kitchen or one of another hundred amazingly uncontrollable conditions) I tend to add a little splash of my favourite white wine at this stage and mix well and then add a little of the cooking juices from the cooked turkey just before serving.

Enjoy your Turkey!

zack

الأحد، 4 ديسمبر 2016

glutenfree almond-hazelnut cake with sugared cranberries and almond brittle & beautiful orchids


we are totally in a christmas mood here already! what about you? actually we've already been ready for christmas since november when we've been shooting christmas food for a client and started to listen to christmas music already (and haven't stopped since then). so here's our first christmas cake for you this year - each year we love to make sugared cranberries, so of course this recipe involves some too. the cake base is mainly made of ground almonds and coconut blossom sugar (that's why it looks a bit darker). for the filling we combined unsweetened hazelnut butter with maple syrup, a touch of coffee, cinnamon and whipped cream - such a delicious combination!!
also we've teamed up with tollwasblumenmachen* and used some very beautiful orchids for this post. tollwasblumenmachen provides you with a lot of great informations all about flowers and also makes it easy to find a florist close to your home. as you guys know, we absolutely love flowers and almost use them for every post. but we've recognized, that we've never used orchids so far, they haven't been on our mind at all. it was quite suprising for us, that there are more than 25.000 different orchids and that you also can buy them as cut flowers and not only in a pot. they are quite expensive, but also almost last forever. we think they suit our little christmas decoration quite well and add such an elegant twist to everything. what do you guys think? and do you have any favorite flowers, maybe also some in connection to christmas? 
can't wait to share the next christmas recipe with you guys, it's such a lovely time of the year <3
*sponsored


almond hazelnut cake with sugared cranberries & almond brittle

ingredients for a 16-18cm-ø springform pan
almond cake base
180g ground almonds
80g corn starch
100g butter
125g coconut blossom sugar (or another sugar)
4 eggs (size medium/large)
2,5 tsp organic baking powder
1 pinch of salt
150-170ml milk
hazelnut-cream
150g heavy cream
125g hazelnut butter unsweetened (if you use sweetened hazelnut butter, then use much less of the maple syrup or leave it out completely)
100g maple syrup
1 vanilla bean
1 espresso (or 100ml light tasting regular coffee - if you don´t like coffee taste in the cake, just replace the coffee with 100ml water or milk)
a bit water
1 tsp cinnamon
1 pck. agar-agar (6g, or use gelatin)
buttercream
140g soft butter
240g confectioners sugar
a bit milk
sugared cranberries
250g cranberries
250g water
250g white sugar
ca. 50-100g extra fine white sugar (for coating)
almond brittle
100g sugar
50g slivered almonds
topping
edible gold dust and gold glitter

almond cake base 
preheat oven to 180°celsius. butter and flour a springform pan. melt butter and let cool down for a moment. sieve coconut sugar, if needed. seperate eggs, then beat egg whites half stiff, add 2-3 tbsp of the coconut blossom sugar and beat stiff for 2minutes. beat egg yolkes together with the remaining coconut blossom and a pinch of salt until creamy. then beat in the melted butter and 100ml milk. blend cornstarch and organic baking powder and stir in the mixture using the dough hook now. then fold in first the ground almonds and then in 2-3 portions the beaten egg whites (use a whisk or a silicon spatula). depending on the consistency stir in 50-70ml milk, if needed. fill cake batter into springform pan and bake cake base for 50-55min (make the toothpick test). because of the coconut blossom sugar the outside might turn out quite dark, but inside the base will stay quite light. let cake base cool down on a cooling rack for 20min, before you remove the springform pan. if the middle of the cake base has grown too high, just cut off a bit, so it is a bit more even.
hazelnut cream with coffee
mix unsweetened hazelnut butter with maple syrup, cinnamon and vanilla pulp. whip the heavy cream and fold in the hazelnut-maple-syrup-butter (use a whisk or similar). add as much water to the espresso that you´ll have 100ml coffee-water, then stir in the agar-agar and boil for 1minute (stir constantly). quickly fill the coffee-jelly into a mixing bowl, then stir in about one quarter of the hazelnut-cream, then fold in the remaining cream in two portions. let hazelnut-cream chill for 10-30min in the fridge until it turns more firm and you can spread it on the cake bases. cut cake base into 3 bases, you should use the bottom base as the new cake top, but just upside down, because the bottom is even. spread a thick layer of hazelnut-cream on the other 3 bases, but just until 1cm before the edge. place both bases separately in the fridge until the cream is more firm (maximum 1-2 hours).
buttercream
sieve confectioners sugar. beat soft butter 1-2 minutes, then add confectioners sugar in 2-3 portions until well blended. if the buttercream is too firm to spread, then just add a bit milk (tablespoon by tablespoon). fill buttercream into an icing bag with round icing tip (about 10cm-ø). put the cake bases on top of each other (if you want to be on the safe side, you can insert 3 toothpicks or bamboo skewers in the cake, which you can remove before serving). fill first the gaps between the cake layers, fill enough buttercream, that it´s oozing out already, which makes it easier for you to smooth it down on the outer side - use a cake spatula. in the end spread more buttercream on the cake top. leave the cake once more in the fridge until the buttercream is more firm. decorate cake with almond brittle and cranberries. sprinkle gold dust and some gold glitter on top.
sugared cranberries
bring water and white sugar to boil until the white sugar is dissolved and it turns to a syrup. let syrup let cool down for 1 hour, then fill into a jar glass (size of 800-1000ml) and add the washed cranberries - close the jar. let the cranberries infuse for at least 4-5 hours or overnight - if you have the time, shake the jar glass every 30min, so you make sure, that all cranberries are evenly covered with syrup.
afterwards sieve the cranberries (not too long, overwhise they might stick together). place cranberries on a large plate with a preferably higher edge, dust with extra fine sugar, then shake carefully the plate, so all cranberries are covered perfectly with "snow". (this sweet sour snack is also a great little christmas treat, esspecially when you give it away together with gingerbread, almond cookies, cinnamon stars or similar).
almond brittle
chop slivered almonds finely, sieve, so the almond "dust" is removed. lay out ready 2 pieces of parchment paper and a rolling pin. caramelize the sugar in a pan or small saucepan. quickly stir in the chopped almonds, spread the mixture on one layer of parchment paper and cover with the second. roll out fast and as flat as possible. let almond brittle cool down for 15min, before you remove the parchment paper. break almond brittle carefully in smaller pieces and sprinkle with edible gold dust, if you have some.

german translation
wir sind schon total in weihnachtsstimmung! ihr auch? eigentlich haben wir schon seit november das gefühl, dass bald weihnachten ist, da war nämlich unsere erste weihnachtsproduktion für einen kunden. und um uns in stimmung zu bringen, haben wir angefangen weihnachtslieder zu hören (und seit dem nicht mehr aufgehört). hier ist also unser erster weihnachtskuchen für euch dieses jahr und natürlich sind gezuckerte cranberries involviert, denn wir lieben es jedes jahr aufs neue sie zuzubereiten! der fluffige kuchenteig besteht hauptsächlich aus gemahlenen mandeln und kokosblütenzucker (deshalb ist er auch etwas dunkler). für die füllung haben wir ungesüßte haselnussbutter mit ahornsirup, ein hauch von kaffee, zimt und schlagsahne gemischt - so eine köstliche kombination!!
außerdem haben wir uns mit tollwasblumenmachen* für diesen post zusammengetan und diese wunderschönen orchideen als dekoration benutzt. tollwasblumenmachen stellt informationen zu vielen verschiedenen blumen bereit, bietet inspiration rund ums thema blumen und macht es euch einfach einen floristen ganz in eurer nähe zu finden.  wie ihr vielleicht schon mitbekommen habt, lieben wir blumen sehr und sie kommen fast in jedem unserer posts vor. aber orchideen haben wir bisher kaum aufmerksamkeit geschenkt, sie hatten wir irgendwie gar nicht auf dem schirm. wir waren ziemlich überrascht, dass es 25.000 verschiedene orchideen gibt und dass man sie auch als schnittblumen und nicht nur im topf kaufen kann. sie sind zwar verhältnismäßig teuer, halten dafür aber auch recht lang in der vase. und wir finden sie passen ganz wunderbar zu unserer kleinen weihnachtstafel und geben allem einen eleganten und festlichen twist. was meint ihr? und habt ihr lieblingsblumen oder pflanzen, vielleicht sogar in verbindung mit weihnachten?
wir freuen uns schon bald das nächste weihnachtsrezept mit euch zu teilen <3
*sponsored


mandel-haselnuss-torte mit gezuckterten cranberries & haselnuss-krokant

zutaten für eine 16-18cm-ø springform
mandelboden
180g gemahlene mandeln
80g speisestärke
100g butter
125g kokosblütenzucker (oder ein anderer zucker)
4 eier (gr. m/l)
2,5 tl weinsteinbackpulver
1 prise salz
150-170ml milch
haselnuss-creme mit leichter kaffeenote
150g schlagsahne
125g haselnusscreme ungesüsst (bei gesüsster haselnuss-creme viel weniger oder gar kein ahornsirup verwenden)
100g ahornsirup
1 vanilleschote
1 espresso (oder 100ml leichten filterkaffee - wer kein kaffeegeschmack im kuchen mag einfach durch 100ml wasser oder milch ersetzen)
etwas wasser
1 tl zimt
1 pck. agar-agar (6g, oder gelatine verwenden)
buttercreme
140g weiche butter
240g puderzucker
evt. etwas milch
gezuckerte cranberries
250g cranberries
250g wasser
250g weisser zucker
ca. 50-100g feiner weisser zucker (zum bestreuen)
mandelkrokant
100g zucker
50g mandelstifte
topping
essbarer goldstaub und goldglitter

mandelboden
ofen auf 180°C vorheizen. springform buttern und mehlen. butter schmelzen und kurz abkühlen lassen. kokosblütenzucker je nach konsistenz sieben. eier trennen, eiweiss halbsteif schlagen, dann etwa 2-3el vom kokosblütenzucker hinzufügen und 2min steif schlagen. eigelbe zusammen mit dem restlichen kokosblütenzucker und einer prise salz cremig aufschlagen, dann die flüssige butter unterschlagen, dann etwa 100ml milch unterschlagen. speisestärke mit dem weinsteinbackpulver mischen und unterrühren (nun den knethaken-aufsatz verwenden). jetzt die gemahlenen mandeln unterheben. dann den eischnee in 2-3 portionen unterheben (mit einem schneebesen oder silikonspatel). je nach konsistenz nochmals 50-70ml milch unterrühren. teig in die springform füllen und für 50-55min backen (stäbchenprobe machen). (wenn man mit kokosblütenzucker bäckt, wird der kuchenboden von aussen sehr dunkel - innen bleibt er aber relativ hell.) kuchen auf einem kuchengitter 20min abkühlen lassen bevor man die springform entfernt. falls der kuchen in der mitte sehr hochgegangen ist, dann einfach den größten teil des überschüssigen "hügels" gerade abschneiden.
haselnuss-creme mit leichter kaffeenote
ungesüsste haselnusscreme mit dem ahornsirup, zimt und vanillemark verrühren. schlagsahne aufschlagen und unter die haselnusscreme heben (mit einem schneebesen o.ä.). zum espresso soviel wasser hinzufügen, dass es 100ml ergeben, dann das agar-agar einrühren und 1min aufkochen (ständig rühren). kaffee-gelee zügig in eine rührschüssel füllen, dann haselnuss-schlagsahne in 2-3 portionen unterrühren bzw. unterheben. haselnuss-creme 10-30min in den kühlschrank stellen bis sie anfängt fester zu werden und man sie auf die tortenböden streichen kann. kuchenteig in 3 böden zerteilen, dabei den untersten boden verkehrt herum als obersten boden für die torte verwenden, da der boden so schön gerade ist. auf die anderen beiden böden dick haslnusscreme verstreichen, dabei 1cm zum rand platz lassen. beide böden getrennt voneinander in den kühlschrank stellen, bis die creme festgeworden ist (1-2 stunden maximal).
buttercreme
puderzucker sieben. weiche butter 1-2 minuten aufschlagen, dann den puderzucker in 2-3 portionen dazugeben und unterschlagen. eventuell etwas milch hinzugeben, falls die buttercreme noch zu fest ist zum verstreichen (milch nur esslöffelweise hinzufügen). buttercreme in einen spritzbeutel mit runder spritztülle (etwa 10cm-ø) füllen. dann die kuchenböden aufeinandersetzen (zur sicherheit, damit nichts verrutscht, kann man 3 schaschlickspiesse durch alle böden stechen - kurz vor dem servieren wieder entfernen). buttercreme zuerst in die lücken zwischen die böden füllen, soviel, dass die buttercreme "herausquillt". "überstehende" buttercreme dann mit einem kuchenspachtel glattstreichen - am besten im kreis herum. zum schluss buttercreme auf dem tortendeckel verteilen und glattstreichen. torte in den kühlschrank stellen, damit die buttercreme fester wird. vor dem servieren mit mandelkrokant und gezuckerten cranberries dekorieren.
gezuckerte cranberries
wasser mit zucker aufkochen bis sich der zucker aufgelöst hat und ein sirup entstanden ist. sirup
1 stunde abkühlen lassen, in ein weckglas o.ä. füllen, dann die gewaschenen cranberries dazugeben und verschliessen (das weckglas sollte am besten ein fassungsvermögen von 800-1000ml haben). die cranberries für mindestens 4-5h ziehen lassen (oder einfach über nacht) - am besten alle 30min das weckglas schütteln, damit alle cranberries wieder gut mit sirup bedeckt sind. anschliessend cranberries gut in einem sieb abtropfen lassen (nicht zu lange, sonst kleben alle aneinander). cranberries auf einen teller mit rand o.ä. legen, mit feinem zucker bestreuen und den teller hin-und herschütteln, sodass die cranberries gut von allen seiten mit zucker bedeckt sind. (dieser süss-saure snack eignet sich auch sehr gut zum verschenken - zusammen mit lebkuchen, keksen und anderen weihnachtlichen leckereien).
mandelkrokant
mandelstift fein hacken, sieben, sodass der feine mandelstaub abgesiebt wird. 2 stück backpapier und eine teigrolle bereit legen. zucker in einer pfanne oder einem kleinen topf karamellisieren lassen. zügig mandelstückchen unterrühren, auf ein stück backpapier füllen, das zweite stück backpapier darüber legen und mit der teigrolle so flach wie möglich ausrollen. mandelkrokant 15min abkühlen  bzw. aushärten lassen bis man das backpapier entfernt. mit den händen vorsichtig in kleine stücke brechen. wer essbaren goldstaub hat, kann die stückchen damit etwas bestreuen.
MerkenMerken